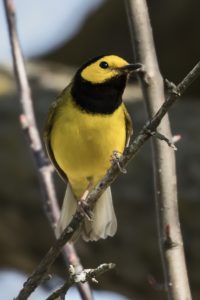
So you’ve decided to give bird photography a try! You’ve rented, bought or borrowed a digital SLR and a lens. Now what?
Remember, what you’re looking for right now is to find out if this art form is for you. You want to find out if you enjoy the process of photography. And the way to find this out is certainly not to shoot terrible photos, which is terribly frustrating-but it isn’t necessary to shoot National Geographic quality photos either. We’re all somewhere on the learning curve. Let’s focus on getting some acceptable shots that inspire us to keep at it.
A quick reminder here: birds are relatively small and they move around quite a bit-sometimes at very high speeds. What this adds up to is quite a photographic challenge. In its initial stages I would hazard that bird/wildlife photography is more difficult than many other forms of photography. I want you to be patient with yourself-this is not easy!
We Want Sharpness and Light
Now what makes an acceptable shot? Simply, we’re looking for as much sharpness as we can manage and enough light to bring clarity to the image. That’s it; that’s where we begin.
Firstly, sharpness. This is primarily a function of two things: stability of the lens and shutter speed. Secondly, light or what we would call exposure in photographic terms. This is basically a function of ambient light in the environment and aperture. Of course as we advance in our knowledge we learn that these factors are all interrelated-as one changes the others change accordingly. But for now let’s not get overly concerned with the technical.
Some beginning settings
One of the easiest things you can do to obtain acceptable images of birds is to shoot during the day when there is enough ambient light. Avoid early mornings, late evenings, or very dark and dreary days. Also, to begin with it is easiest to keep the sun/light at your back-so the sun and your camera are both pointing at your subject. Shooting into the light, where your subject is heavily backlit, is an exposure challenge you just don’t need right now. Also, try to capture birds while they are stationary-perching or standing. Birds in flight pose quite a few difficulties.
Secondly, if your lens has something called Image Stabilization (Canon-a switch located on the lens body and labelled IS) or VR (Nikon-standing for vibration reduction) please turn this on. This feature helps the camera and lens compensate for small movements you make when you snap the shutter. It is very difficult to keep a camera (especially one with a 400 mm lens attached) perfectly still. Once you have this turned on, find a body position, usually elbows hugged close to your sides, that helps you keep the camera as steady as possible. Even trying to snap at the beginning or end of a breath can help.
Another simple step to take which can net us a greater number of sharp images is 1.) to shoot in AI SERVO (Canon Continuous Autofocus-in the main menu under Auto Focus modes) or AF-C (Nikon) with 2.) Continuous Shooting (in the main menu under Drive modes). Even though you are targeting stationary birds, they are rarely completely immobile. These settings tell the camera that we are shooting moving objects and that we’d like the camera to be able to take one shot after another at the highest speed the camera can manage-as long as we hold the shutter button down. Typically, a series of shots like this will contain at least one sharp image.
The next thing you can do is to put your dSLR in the Program Mode (noted as P and located on the main dial on the top of the camera-this is an Autoexposure mode). Fully automatic. Please do not feel that you are not doing “real” photography if you do this. When I first started driving I learned on an automatic transmission-not a stick shift-but I was still driving! Remember, we want acceptable images to get us inspired – not frustration. The fully automatic mode exempts us from having to deal with aperture, shutter speed or ISO at this stage. The camera will make its best guess-and these dSLR cameras are quite intelligent. We’ll talk more about advanced exposure modes in subsequent articles.
Finally let’s talk about viewing your images. You don’t need to invest in any particular software or editing programs at this point. Just follow the instructions of your camera to get your images onto your computer so that you can view them in a larger format. Take note of the shots that worked particularly well for you-and go out and take some more under the same conditions! Notice when the subject is backlit and therefore dark-remind yourself to shoot with the light behind you. Try to puzzle out what you did well and what was challenging. Make a few notes and try again. And if you enjoyed your new focus and the wonder it inspires for these creatures then don’t give up. You will improve.
See you out there!
by Demayne Murphy

